Soap Making Kits
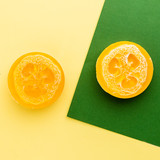
Golden Sunshine Melt and Pour Soap Making Kit
$35.53

Our Golden Sunshine melt and pour soap kit is the perfect gift idea for anyone you know that wants to get into soap making. This melt and pour soap kit contains everything you'll need to create high-quality, fragrant melt and pour soaps that look great and smell even better. The kit includes complete instructions that are easy to follow, so it is perfect for both experienced soap makers and beginners.
Share this product:
Product Details
Usage & Recommendations
Making our Golden Sunshine Melt & Pour Soap:
Here's what's included in your kit:
- Shea Butter Melt & Pour Soap Base
- Clear Melt & Pour Soap Base
- Golden Sunshine Fragrance Oil
- Calendula Flowers
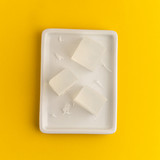
- Basic Rectangle Mold
- 4 ounce Clear PET Bullet Bottle
- White Fine Mist Sprayers
Intstructions:
- Clean and sanitize your work area and all of your packaging materials. It is suggested that you wear gloves and a hair net while preparing this recipe. Fill your bullet bottle with rubbing alcohol. Place the sprayer on the bottle.
- First, we will prepare the clear layer. Weigh out and melt 265 grams of the Diamond Clear Melt and Pour Soap Base. You can melt the soap base using your microwave in 30-second intervals, stirring between each 30-second burst. Heat the soap only until it is in a liquid state. Alternatively, you can use a double boiler to melt your soap base.
- When the soap base is in a fluid state, add 8 grams of the Golden Sunshine Fragrance Oil. Stir to blend the fragrance.
- Pour the soap into each cavity of your mold, dividing the soap equally between the three cavities. Then, sprinkle calendula into each cavity. Finally, spray each of the bars with alcohol to release any air bubbles. Allow this layer to set up completely before moving on.
- Next, prepare the white layer. Weigh out and melt 135 grams of the Shea Butter Melt and Pour Soap Base. Once melted, add 4 grams of the Golden Sunshine Fragrance Oil and stir.
- Spray each cavity of the basic rectangle mold with the alcohol. This will allow the layers to adhere to one another. Then, pour the white soap base directly on top of the clear layer. Again, spray each cavity with alcohol to remove any air bubbles. Allow the soap to set up.
- Once the soap has setup, remove it from the molds. Your soap is ready to use! If you are not using your soap right away, make sure your wrap it with shrink wrap to prevent sweating.
Your melt & pour soap is now ready to use!
- Makes:
- 3 Bars
- Time to Make:
- 1 Hour
- Difficulty:
- Easy
- Instructions Included?
Kit Specifics:
PRODUCT REVIEWS
What Everyone is Saying
Related Products
Products You Also Might Love


